

Showing posts with label Artbooking Cartridge. Show all posts
Showing posts with label Artbooking Cartridge. Show all posts
Monday, August 25, 2014
Artbooking Made Easy: All-Star Scrapbooking
I love how we Crafters don't waste anything! I have this drawer and a Ziploc bag full of paper scraps and negative pieces from other projects! You never know when they will come in handy! Head to my Shop and get your very own Artbooking Cartridge today! Get Crafty, My Friends!

Saturday, August 23, 2014
New Heights Abound
By the way the adorable little girl in this cute project is the daughter of one of my amazing upline, Mandy Leahy! I love this cute layout! I especially love the balloons with the Sparkle Gems! This is so cute and not as hard as it might seem to do. Don't let these fancier projects make you nervous! Give it a try, you might find that they are far simpler to do then they would seem! Head to my Shop and pick up all your sparkly gems for your project today!
Get Crafty!
Thursday, August 21, 2014
Artbooking Made Easy: Artbooking My Life
Keep it simple. Or keep it snazzy with bling, pop and more! Picture My Life is the perfect Scrapbook, cardmaking, whatever project happy medium! I have seen some truly amazing things done with these cards. I figured that they were really for those who wanted to keep scrapbooking simple and it is! No question about it, its made for even the newest of scrapbooking newbies. Yet, when I went to Convention back in June, I saw examples of various uses of our Picture My Life cards. Some projects showed exactly like what Monica shows in this video, extra embellished PML cards in a layout. I also saw them make cards, tags, used on standard scrapbook layouts and more. They come in all sorts of different sets that correspond to our paper packs!
Grab your very own PML sets, by heading to my Shop and ordering today! Remember: Get Crafty!
Sunday, August 17, 2014
Floating Your Fancy
Want to make your own Floating Window? Head to my Shop and pick you your supplies today! Remember: Get Crafty!
I absolutely love this month's Stamp of the Month! You can purchase this set for just $5 when you spend $50 or more. You can also purchase the set alone for $17.95. Its such a great deal and you don't want to miss it. Hurry because after the 31st of August, it will no longer be available!

Thursday, August 14, 2014
Shhhh...It's Top Secret


This particular project I worked on while I worked on the 'Daddy Files' mini album. So I used the same Top Secret keys from the Artbooking cartridge. I honestly haven't played as much with my Artbooking cartridge until recently and have found how much I absolutely love it! Even if you just want one of these little images to add some pop to a scrapbook layout or to a card. Or really whatever floats your boat, you can! Its easy to resize an image to fit a particular project. Its easy to layer up the images, like I did with the star medal. I just cut out the same sized image in both red and yellow, then cut the star out and placed it on top of the red ribbon.
I love how this card turned out! Its not a traditional shaped card, which I loved. I think the file folder look is awesome and then matching up images that would work with it was fun. I made sure to give it a grungy, old feel by sponging the edges in Cocoa and Chocolate Ink, as well as going lightly across the base inside and out. Simple and yet, super cute. If you haven't bought your Artbooking cartridge, you really should! Great for any crafter!
Head to my Shop and place an order today!
Remember: Get Crafty!
Monday, August 11, 2014
Artbooking Made Easy: Nursery Rhymes
I love being crafty and showcasing my projects (even if they didn't turn out that great!) Remember: Get Crafty!
Checkout my Shop and order some fabulous new products today!
Here is August's Stamp of the Month and it can be yours for $5 when you spend $50 or more. If you just want the stamp set, you can order it for $17.95. Don't miss out on this super cute set, before its too late! Available till midnight August 31st.

Saturday, August 9, 2014
Artbooking Made Easy: Fab Frames
Here is August's Stamp of the Month and it can be yours for $5 when you spend $50 or more. If you just want the stamp set, you can order it for $17.95. Don't miss out on this super cute set, before its too late! Available till midnight August 31st.
Friday, August 8, 2014
The Daddy Files

Hey Everyone! I hope you are all having a great day and enjoying what's left of summer! I can hardly believe that school starts in just over a week for us here. I will have two kids in school and my Hubby & I are headed back to school ourselves. I'm feeling a little unprepared for this big change for us, but totally excited at the same time!


 Well I know that this is kind of off for the timing, especially since Father's Day was back in June. I had to wait to share this awesome mini album I made using the Artbooking Cartridge for a customer until she had given it to her honey! Now when I started this little project adventure, I had never made a mini album and so I was pretty nervous. (See even I get nervous sometimes, especially when working on something for a customer!) But it turned out to be pretty easy to do.
 I used most of the images on the Top Secret key from the cartridge and just sized each of the pages so that they matched. Sized the cute images to work with the size mini album and then I went to work cutting. Of course gluing too! I was pleased with the turn out! I obviously could have gone with more embellishments but I decided that if my customer wanted more to it, then she could add what she felt it needed to complete the gift. I liked the simplicity especially since it was meant to look like top secret files! I think in the end the hardest part was punching holes in all those pages for the cute Baker's Twine I used to hold it all together. I actually broke the hole punch my hubby bought for me and I had to go pick up a crafting one, so it could handle all the layers.

I hope this gives you fun ideas of great gifts and projects that are so simple to do! Don't forget Get Crafty!
Want to add the Artbooking Cartridge to your collection? Head to my Shop and snag one today!
Items Used
Artbooking Cartridge
Cashmere Cardstock
Outdoor Denim Cardstock
Slate Cardstock
Olive Cardstock
Buttercup Cardstock
Crystal Blue Cardstock
Black Cardstock
Some various decorated cardstock
Chocolate Ink
Cocoa Ink
August's Stamp of the Month is this super cute 'Owl'oween set! I
absolutely adore this set!
Spend $50 or more and get this set for only $5, or order it at its
regular price of $17.95. Remember not to let this cute set pass you by,
because starting September 1st it will no longer be available

Tuesday, August 5, 2014
Artbooking Made Easy: Love Is In the Air
I realize that this video was made just in time for Valentine's Day, but here we are in August and I'm finally sharing it with all of you. I think that this such a cute layout idea and is inspiring for layouts any time of year. I find I do tend to gravitate toward themes that coordinate with the seasons/holidays, but I also love to mix things up and try new layouts no matter the season. Don't be afraid to make a more romantic or even a Valentine's themed layout in August or whenever you feel the desire to do so. I hope this video has given you some fun new ideas to work with and if you find you are missing supplies or even finally want to purchase your own Artbooking Cartridge, check out my Shop and put in your order today!

This month's Stamp of the Month is this super cute Circus Alphabet set. You can add it to your collection for Only $5 when you spend $50 or more. Or you can purchase it for full price of $17.95 during the month of July.
Sunday, August 3, 2014
Artbooking Made Easy: Togetherness
So I totally love how they show you exactly what pages all of the items you'll be cutting out for these projects are found. It makes it so easy to follow along and find exactly what they are working with. I love that they show how to do things like the flowers (which they make seem soooo easy, of course doing it their way probably is) and teach those old & new to the techniques how to do it! So if you haven't had an opportunity to play with the Artbooking Cartridge, you are missing out! Now I haven't gotten to play with too many 'outside' cartridges, but I love variety that ours offers and the ease in which you can combine layout pieces to work for YOUR projects! It is well worth the money you spend, not to mention getting 700 images in one place, 3 D-sized stamp sets that coordinate and the 3 sheets of Dimensional Elements that also coordinate. What a deal and only $99! (I'll let you in on a secret, if you host a party and you can get your party to reach $250 or more, then you can use the Hostess' 50% off on a Cricut Cartridge of your choice!) So, head on over to my Shop and buy your Artbooking Cartridge today. Or contact me about hosting an Online or in your home party today! Remember Friends to Get Crafty!
Tuesday, July 22, 2014
Artbooking Made Easy: Sweet Smiles
What a cute idea for a Baby Shower gift or even for your own baby! I love the ideas that they share and that its so easy to do. Great ways to use your overlays and envelopes so your album can hold notes & little items that you want to save. Its also always great to see the cutouts and overlays used not only on layouts, but cards as well. Showing that you're not limited in what you can do with these fun cutouts from our Cricut cartridges! I hope this video has given you more great ideas and that you feel ready to take on the world, one mini album at a time! If you want to add the Artbooking Cartridge to your collection or pick up other supply items so you can work on your latest projects, head over to my Shop and order yours today! Remember: Get Crafty!
Tuesday, July 15, 2014
Artbooking Made Easy: Sugar & Spice
I love all the overlays available on the Artbooking Cartridge! So far I think it has to be my favorite cartridge! So many uses for the overlays and frames, it doesn't even have to just be for layouts. Use them for cards or whatever project you are currently working on. Guaranteed that it will add something to whatever it is you are working on. This helps show how easy it is and how versatile. You can mix and match, and then you have a unique layout or card. Play with it, see what appeals to you! If you don't have your Artbooking Cartridge, then head over to my Shop and order it today. Why wait? Let the fun and creativity flow! Get Crafty!
Tuesday, July 1, 2014
Artbooking Made Easy: Fun in the Sun
What fabulous ideas for scrapbooking your summer fun! Use the ideas she shares to make your own layouts or use it as an opportunity to expand & grow your ideas for more Summer themed layouts! I hope you are enjoying yourselves in the sun this summer and remember to capture the memories!
Head to my shop: Crafty With Pixie Stedding to place your order today!
Saturday, May 10, 2014
Artbooking Made Easy: Crush on Artbooking
Good Morning! I am on a roll this week! I've had tons of down time, so no real excuse to not post every day! This video had such great ideas to combine Artbooking & Crush books! Who would have thought how great the two would work together! So many ideas and so little time! What a great gift idea! My sister put together her first year together with her boyfriend for Christmas out of one of our crush books, I bet she would have loved using the cute cutouts from Artbooking! I hope you have gained even more fun ideas! Don't forget to check out my FB page for a sneak peak tonight for tomorrow's post and Get Crafty!
Tuesday, May 6, 2014
Artbooking Made Easy: Love, Love, Love
Good Evening Friends, I hope you enjoyed my post from yesterday and got cute ideas for making your own fun Dress Cards for Mother's Day or for whatever event or occasion you think they will be perfect for. I'll be sharing a sneak peak later tonight on FB and will post my latest project tomorrow sometime. For now I hope you'll enjoy this video from CTMH and perhaps find a way to work this super cute idea for Mother's Day or even for Father's Day! The ideas certainly can carry over to whatever project you are currently working on and you should take the time to experiment and learn the new techniques, cause even if you mess up, you'll have learned something new! Don't forget to Get Crafty!
Wednesday, February 5, 2014
Fun Valentine's Cards
Good morning or good night (at least for me anyway), I find I am able to get more work done at night and I kind of like being a night owl! I'm crazy, I know! I've had these photos sitting on my Hubby's computer for the last week and I figured I should probably take the opportunity to blog about them. For those of you who don't know, I'm LDS or a Mormon, which ever you prefer to call me, and I was asked by my Church's local Woman's group known as the Relief Society, to be in charge of the project for our monthly activity this month. The request was to do some kind of Valentine's cards, something simple and inexpensive. Which of course I said yes, because how could I say no. I mean I do this for fun and for a living, but I still felt panicked! I had to be creative and what if I wasn't able to come up with something cute?
I was worried, but I started by looking at Valentine's sayings to see if there were any that I liked. I was surprised at how easy it was to create once I had a cute saying to work from. What I decided to do was have a 'kit' that would have three small 3"x3" cards that were more fun and then a 'kit' for one A2 card that was more romantic. (I actually shared that one in my post: Damask Divas Blog Hop: Ivy Lane) I kept them fun and simple. They were a hit, when they displayed them so people could sign up to make them. (Makes me feel good!)
So, here they are in all their glory! What do you think?
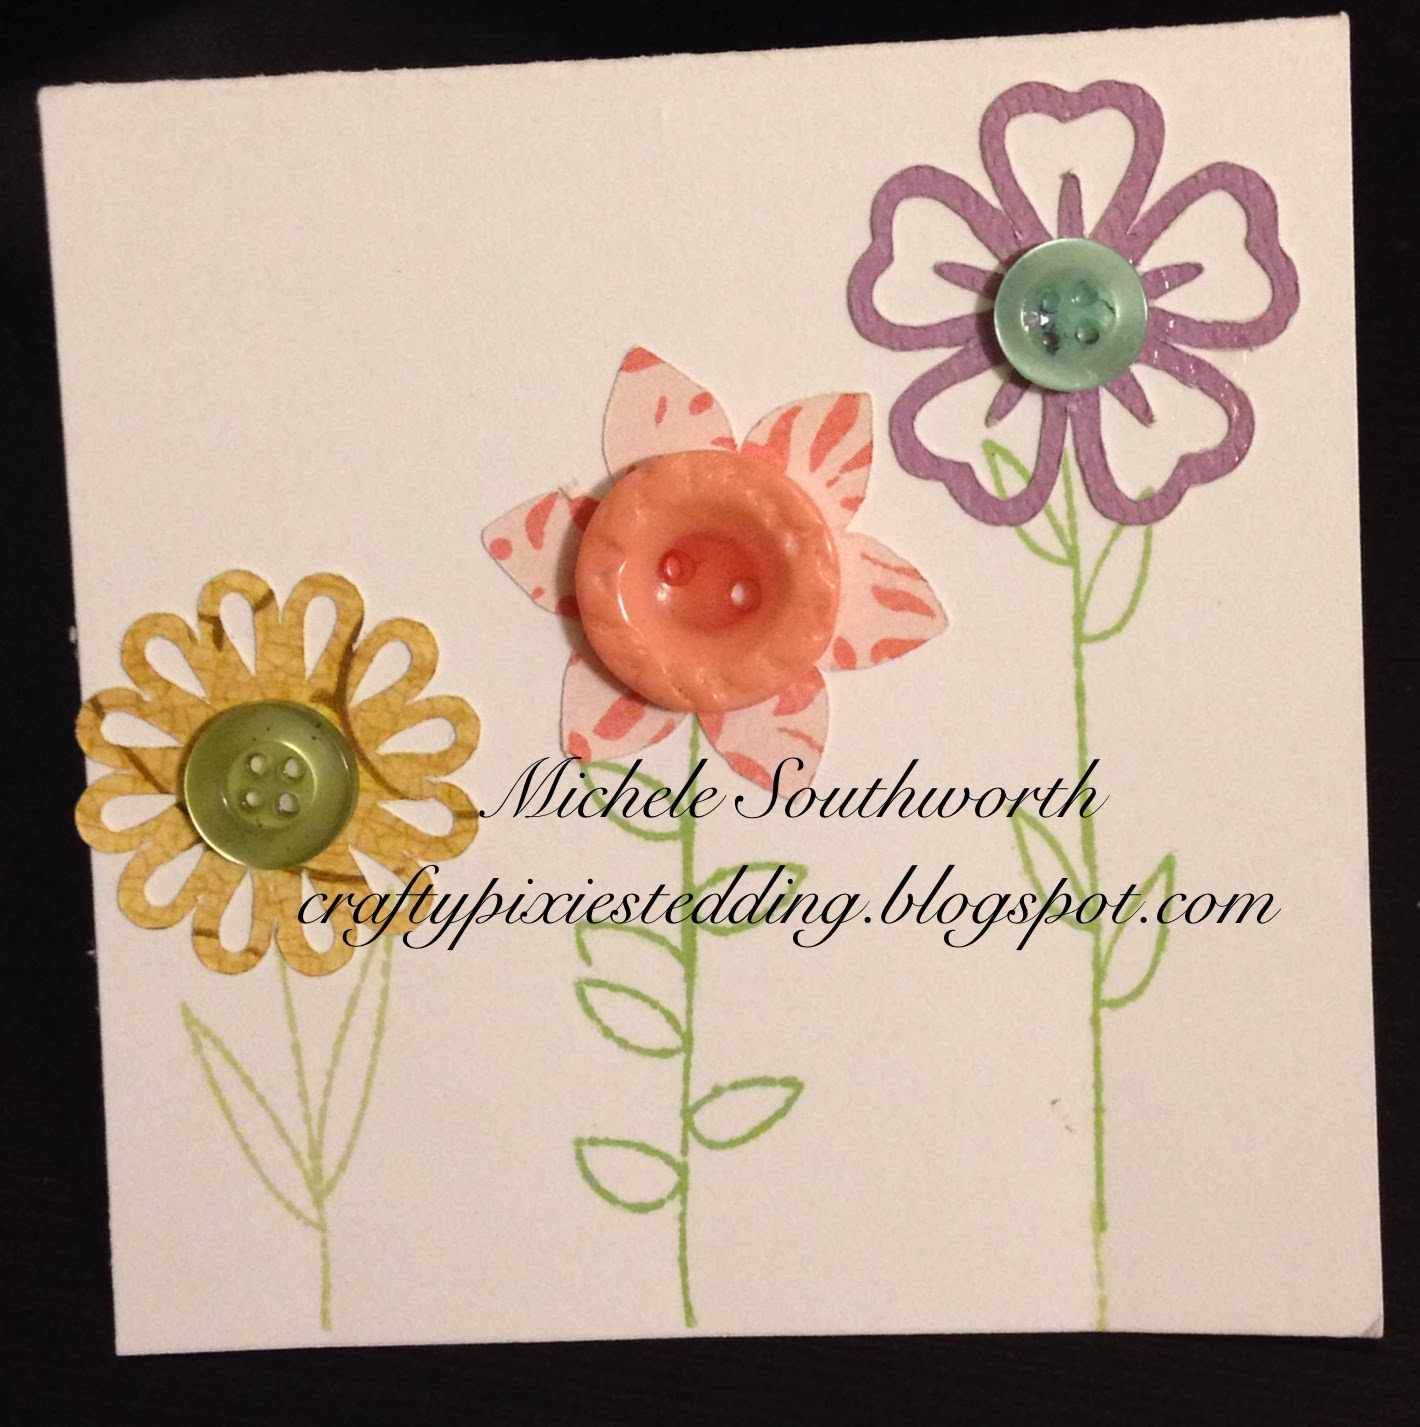 "Cute as a Button"


"Owl Be Seeing You, Valentine"
Supplies
Want to try making your own super fun Valentine's cards? Head over to my website, HERE and order your supplies right away! I also will be selling ready made kits for these cards. For a set of 12 cards (4 of each design) it will be $15+shipping. Contact me if you're interested. I really had a lot of fun putting these cards together and they were so simple. Aside from cutting the card bases myself, everything else was cut with my Cricut! If you haven't had a chance to use a Cricut, you are missing out and I find making projects so much easier with it!
Anyway, I hope this has inspired you to make Homemade Valentine's cards or to just pull out & work on a new or old project! Get Crafty!
I was worried, but I started by looking at Valentine's sayings to see if there were any that I liked. I was surprised at how easy it was to create once I had a cute saying to work from. What I decided to do was have a 'kit' that would have three small 3"x3" cards that were more fun and then a 'kit' for one A2 card that was more romantic. (I actually shared that one in my post: Damask Divas Blog Hop: Ivy Lane) I kept them fun and simple. They were a hit, when they displayed them so people could sign up to make them. (Makes me feel good!)
So, here they are in all their glory! What do you think?
"Cute as a Button"
"I'm Falling for You"
"Owl Be Seeing You, Valentine"
Supplies
Artbooking Cartridge
Lollydoodle paper pack
Buttons, Bits and Bobs stamp set
Buttons
Googly Eyes
Pear Ink
Olive Ink
Sweetleaf Ink
Enjoy the Little Things stamp set
Want to try making your own super fun Valentine's cards? Head over to my website, HERE and order your supplies right away! I also will be selling ready made kits for these cards. For a set of 12 cards (4 of each design) it will be $15+shipping. Contact me if you're interested. I really had a lot of fun putting these cards together and they were so simple. Aside from cutting the card bases myself, everything else was cut with my Cricut! If you haven't had a chance to use a Cricut, you are missing out and I find making projects so much easier with it!
Anyway, I hope this has inspired you to make Homemade Valentine's cards or to just pull out & work on a new or old project! Get Crafty!
Monday, February 3, 2014
Artbooking Made Easy: Inspiration Mini Albums
Good Evening Everyone, today I'm going to share another great video from Close To My Heart. I hope you find these videos as awesome and inspiring as I do. I enjoy learning new ways to play with my Crafty Toys! I honestly haven't cut out any of the Mini Albums from Artbooking yet, well I guess I've used some of the overlays on cards, but never as an actual album. I'll admit I've been intimidated by the idea, as cool as it sounds and they look. But once you watch these great videos that walk you through the steps, how can I not want to put together a few of my own. Check this out and see how it inspires you!
Want to snag your own Artbooking Cartridge and make your own Mini Albums? Head over to my website, HERE and buy yours today! Don't forget to Get Crafty!
Want to snag your own Artbooking Cartridge and make your own Mini Albums? Head over to my website, HERE and buy yours today! Don't forget to Get Crafty!
Friday, January 31, 2014
Damask Divas Blog Hop: Ivy Lane

Welcome Ladies to another super fabulous Damask Divas' Blog Hop! If you came from Sharon's Blog, you are in the right place. If you have jumped here and just discovered our blog hop, feel free to check the list at Damask Divas Blog to find the complete list of blog hop participants.
This month we are highlighting the New paper pack: Ivy Lane. I love the beautiful prints in this pack and it was hard to decide how best to show them. I actually have been working on some Valentine cards to present to my Church for an activity this month and when I finally had this paper pack in my hands, I found I was drawn to the shades of pink, with hints of green in it.
I needed something simple, but elegant for this card and I think I managed to do just that. I made two different cards, as the first one I wasn't quite as pleased with how it turned out. Both cards have a 2 inch strip of Ivy Lane floral B&T paper, I then decided to use some Pear cardstock on both cards to hold the theme & thought of the card.


On the second card, I wanted to keep with the same theme with some differences. I added some Blush cardstock on the second card to emphasize the color scheme and help highlight the Title, which I did in Blush. I rounded corners to give a gentler touch and topped it off with a bit of lace. I really liked the addition of the lace, because it gave a more romantic look. I used the I Adore You stamp set for the phrase, as well as the heart on the second card. I used Hollyhock done in a second generation stamp to enhance the background. (Second generation means you've ink the stamp, then stamp it once on another paper and then finally stamping it on your project.) I added an additional bit of pop with two small hearts cut from Artbooking cartridge, the second of the two was given a 3D element using our 3D Foam Tape.
I had a lot of fun putting together these cards, trying to create a beautiful card to share and teach with the ladies at Church. I hope this inspires you to pick up your own materials and create beautiful Valentine's cards this year! Head over to my website and order today!
I hope you've enjoyed our Blog Hop thus far, your next stop is Stephanie's Blog! Don't forget to Get Crafty!
Wednesday, January 8, 2014
Project A Day Challenge: Days 2-4

I'm kind of behind on the Project A Day Challenge, but I'm working to catch up. So, sorry this post is going to be a whirlwind of project fun and excitement! I'll keep it simple, if you'd like to know more about each project, just let me know and I can do a more detailed post!
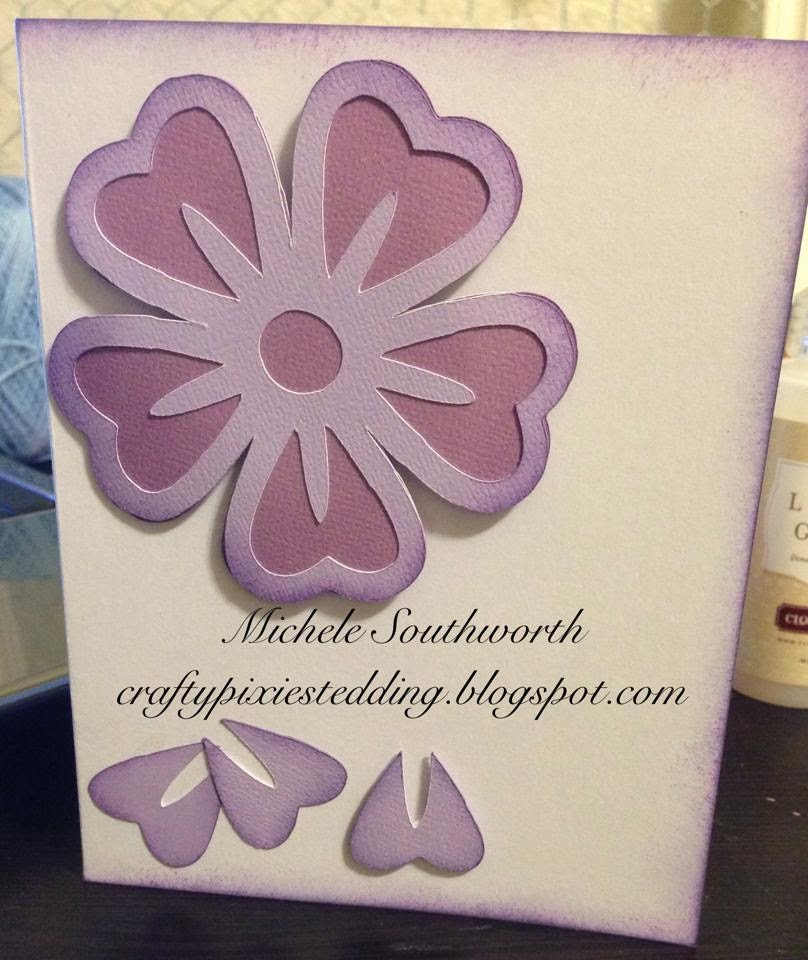

I created this card for Day 2, which was have a flower on it. So I cut this cute flower out with two different shades of purple cardstock and layered them together. I also inked the edges with a sponge to give it some texture and I love the edging look. I also did that to the edges of the card base and to each of the cut outs, that I used as petals. I used an older & retired stamp set from Close To My heart for the inside sentiments and I cut the flower from the Artbooking Cartridge. (A must have!)
Day 3 was use scraps to create a project, I actually had fun creating this card. I used scraps of paper, of which I have a ton, rounded the edges and sponged brown ink on the edges to create a well worn book spine. Then I wrote the names of some classic authors and then stamped a welcome bubble. Such a fun and simple card, that used only scraps to do!


I hope you guys are getting some great ideas from this super fun challenge. I hope its getting you out there testing new ideas and just plain having fun! Send your love to Mandy and share your projects over on her Facebook page: Close To My Heart (CTMH) Scrapbooking & Stamping with Mandy Leahy
Tuesday, December 10, 2013
Artbooking Made Easy: Christmas Layouts
With Christmas right around the corner, who isn't thinking about how to scrapbook their Christmas photos? Check out this fabulous video on the wide variety of layouts that can be created from just two pages in your Artbooking cartridge! Get in the spirit and start scrapbooking now!
Subscribe to:
Posts (Atom)

